Activation Requests

To activate your Data-Only eSIM, you will be required to login to your Mobal online account: www.mobal.com/myaccount

Once you have logged in to your account, simply visit the Services section and click on the Activate button found next to the relevant eSIM product.

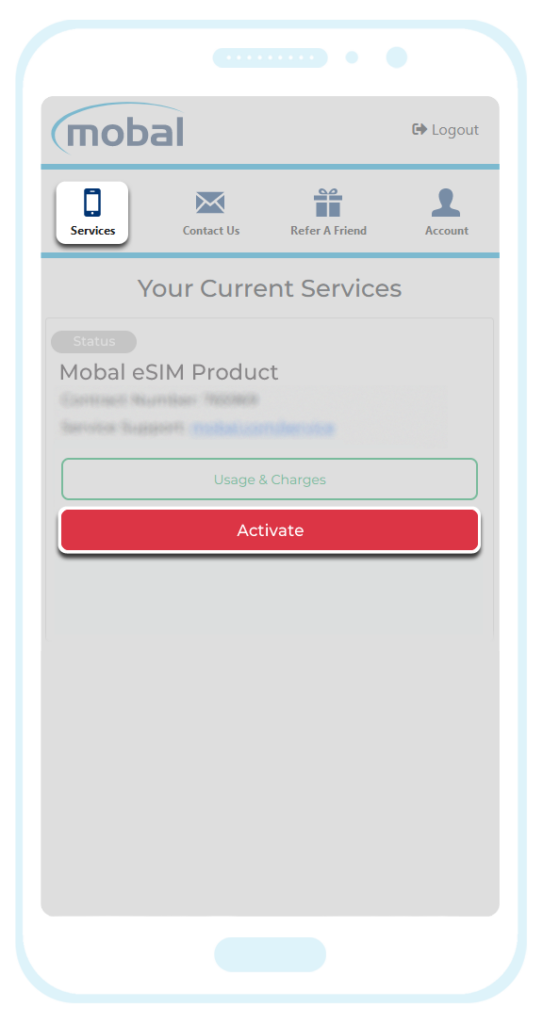
After clicking on the “Activate” button and confirming your device is eSIM compatible, you will be asked to choose an activation date and you can then submit your request for processing.

If you choose a future activation date, you will receive an email (with the subject “Your Mobal eSIM is ready!”) approximately 24 hours before your chosen activation date.

If you request immediate activation, you will receive an email (with the subject “Your Mobal eSIM is ready!”) within approximately 15 minutes.

Confirmation Email (Subject: “Your Mobal eSIM is ready!”)

Depending on when your order was placed, you may receive a different version of the activation confirmation email and the activation process may vary slightly.


If you received an email similar to the one below (that starts with “Your eSIM is Active“) –

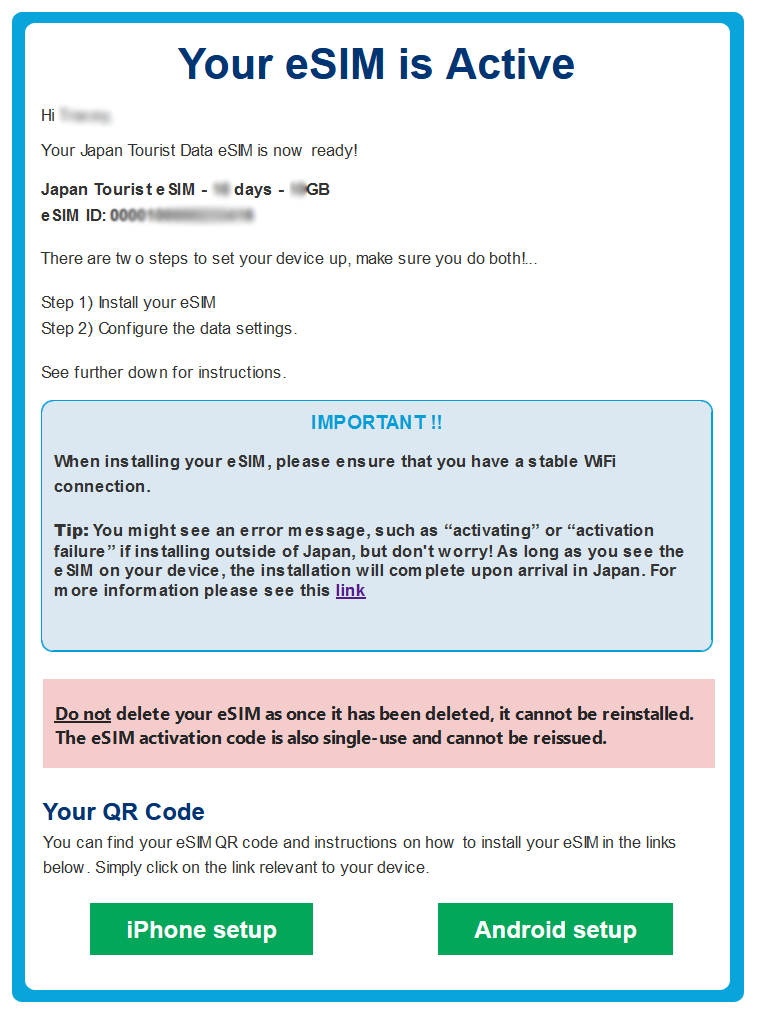
Simply scroll down the email and click on the iPhone Setup button or the Android Setup button.

You can then install the eSIM via the QR code that’s shown or you can install the eSIM manually by following the instructions / entering the information that’s shown.

For additional instructions on how to complete the installation process (via the QR code or by entering the details manually) please visit the following link: Installation Guide


If you received an email similar to the one below (that starts with “Your Mobal eSIM is Ready for Activation” and contains a link to “Your Unique eSIM Portal“) however –

Please click here for additional instructions

After visiting the “Your Unique eSIM Portal” link, you may already be able to see the section below –

Before installing the eSIM, please ensure that your device is connected to WiFi and that the Airplane/Flight Mode feature on your device is disabled

You can then click on the QR Code button (to install the eSIM by scanning the QR code) or you can install the eSIM manually by entering the information shown in the “For Android” and “For iOS” sections.

Once you have installed the eSIM using this method, your plan will begin from the day that you connect to the network within Japan.

If the QR Code / Activation Code is not yet shown but you can see a check box and an “Issue eSIM (Activation Code)” button however –

The activation process will vary slightly and so please do not click this button until 24 hours before you are due to arrive in Japan.

When you are ready, click on the check box (to confirm you agree to the Terms of Service) and then click on the Issue eSIM (Activation Code) button.

After 15 minutes, please return to the “Your Unique eSIM Portal” link and the section above (where you can view the QR code and the manual activation codes) should then be visible.

Once you have completed the installation process, your eSIM plan will begin the following day (when you arrive in Japan and connect to the network).

For additional instructions on how to complete the installation process (via the QR code or by entering the details manually) please visit the following link: Installation Guide

Network Maintenance:

Between the hours of 10pm on Tuesday and 9am on Wednesday (Japan Time), the network will sometimes perform system maintenance. If you request the eSIM activation code during this time, you eSIM details may not be added to the portal until shortly after 9am on Wednesday.