If you have not yet submitted an activation request for your Data-Only eSIM, additional instructions are available at the following link: Activation Guide
Once you have completed the activation process (and you have access to the QR code or the required activation codes for manual installation), simply follow the instructions below.
Important Note: When installing the eSIM, please ensure that your device is connected to WiFi and that the Airplane/Flight Mode feature on your device is disabled.
Installation Guides:
iPhone Handsets
Click here to view our guide
QR Code Installation –
QR Guide (iOS 17 and above):
Click here for additional instructions
- For some versions of iOS 17 (usually iOS 17.4 and above), you can install an eSIM by long pressing on the QR code and then choosing the option to install the eSIM. If your device does not allow this however, please skip to step 2.
- Save the QR code as an image in the Photos app. To save the QR code as a photo, open the image or long press it and then tap Save Image or Save to Photos. Alternatively, you can take a screenshot of the QR code and trim it.
- You should then be able to start the installation process by going to:
Settings > Cellular > Add eSIM > Use QR Code > Open Photos - Once you’ve selected the QR code image, it will be scanned immediately and you can then follow the prompts to complete the installation.
QR Guide (iOS 16 and below):
Click here for additional instructions
- To scan the QR code from the camera app, you would firstly need to make the QR code accessible. You could simply print out the QR code or you can open the QR code on another device.
- You can then scan the QR code by opening the camera app (and scanning the code and following the installation prompts) or you can go to:
Settings > Cellular > Add eSIM > Use QR Code > Scan the code
Manual Installation –
If there are any issues using the QR code, you can also install the eSIM manually by using the “Activation Code” and the “SM-DP+ Address” shown in the iPhone / iOS section.
- Go to Settings > Cellular/Mobile Data > Add eSIM
- Tap Use QR Code and select the Enter Details Manually option
- You can then copy/paste the “Activation Code” and the “SM-DP+ Address” shown in the iPhone / iOS section and follow any final prompts. In most cases, you will see an “Add Cellular Plan” message appear once the details have been accepted.
Error Messages / Delays –
During the installation process however, you may see an “Activating…” or “Connecting to network” message as shown in the images below –
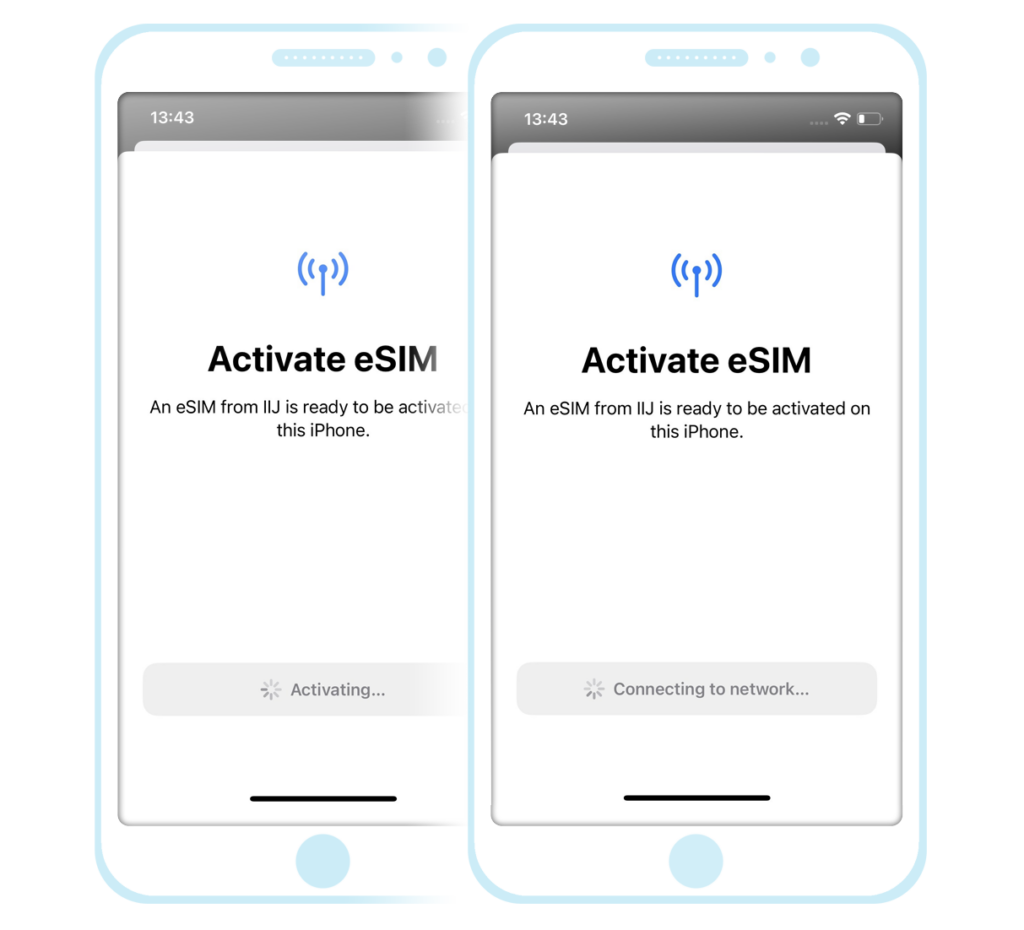
It may take some time for your device to move past this section (while the activation process completes) and so please do not exit out of this screen and just wait for the installation to complete.
After moving past this section however, you may also notice that the status of the eSIM is listed as “Activating…” as shown in the example below –
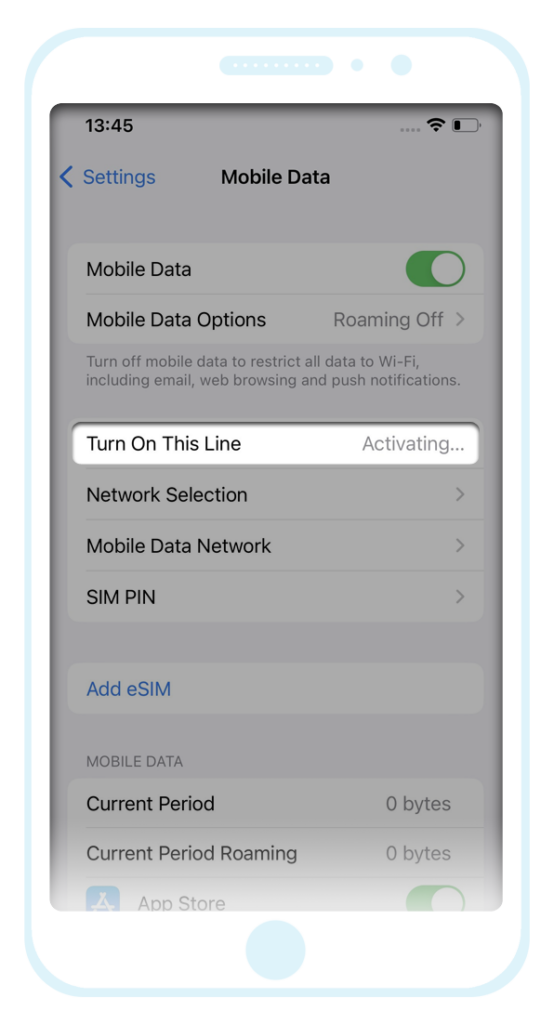
As long as the eSIM is visible on your device however, this would indicate that the installation was successful and the status will change once you have arrived in Japan and you have connected to the network.
If there are any ongoing issues, please do not delete your eSIM (as it cannot be reinstalled and you would require a replacement) and instead just contact our support team on support@mobal.com to discuss the issue.
Data Settings –
If there are any issues accessing Cellular Data after installing the eSIM and arriving in Japan (and enabling the “Cellular/Mobile Data” feature on your device), some additional configuration may be required.
For further assistance, please refer to the information found in the “Data-Only eSIMs” section at the following link: Data Setup Guide
Android Handsets
Click here to view our guide
QR Code Installation –
On most Samsung handsets, you can install an eSIM by going to:
Settings > Connections > SIM card manager > Add Mobile Plan > Add using QR code / Scan Carrier Code
On most Google handsets, you can install an eSIM by going to:
Settings > Network & Internet > Plus Symbol (+) > Download a new eSIM
You can then follow the prompts to complete the installation. If the instructions above are incorrect for your device however, you may need to refer to the user manual for your specific handset.
Manual Installation –
If there are any issues using the QR code, you can also install the eSIM manually by using the code shown in the “Android” section –
- For most Samsung handsets, go to: Settings > Connections > SIM Card Manager > Add mobile plan > Add using QR code / Scan Carrier Code
Select the “Enter the code instead” option and Copy/Paste the code found in the “Android” section. You can then follow the prompts to complete the installation. - For most Google handsets, go to: Settings > Network & Internet > Plus Symbol (+) > Download a new eSIM > Need help? > Enter it manually
You can then Copy/Paste the code found in the “Android” section. Once complete, tap Continue and then follow the prompts. - If the instructions above are incorrect for your device however, you may need to refer to the user manual for your specific handset.
Data Settings –
Once the eSIM has been installed on your device, you will also need to enable the ‘Cellular/Mobile Data’ feature and install the required APN (Access Point Name) profile settings.
For further assistance, please refer to the information found in the “Data-Only eSIMs” section at the following link: Data Setup Guide